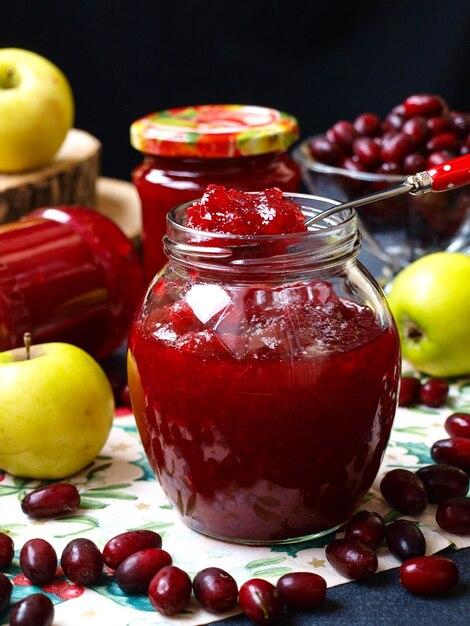
As we embrace the joy of homemade cooking, the allure of making our own jams is undeniable. The thought of spreading rich, flavorful jam on freshly baked bread is enough to make anyone’s mouth water. But the question arises: Can you eat homemade jam right away, or do you need to wait for it to set? In this blog post, we will explore the ins and outs of homemade jam, from the process of making it to the best practices for consuming it. So grab your favorite fruits and let’s dive into the delicious world of homemade jam!
Homemade jam is a labor of love, requiring careful preparation and attention to detail. Whether you are a seasoned jam maker or new to the craft, understanding the proper steps to take after making the jam can ensure its longevity and flavor. From cooling the jam before jarring to processing the jars, there are certain guidelines to follow to achieve the perfect final product. So, let’s address some common questions about homemade jam and discover when it is ready to be enjoyed.
Can You Indulge in Homemade Jam Right Away
So, you’ve just finished crafting a delectable batch of homemade jam. The kitchen smells like a summer dream, and you can practically taste the sweet, fruity goodness beckoning from the jars. But before you dive in with a spoon, let’s address the burning question: can you eat homemade jam right away?
The Waiting Game: Give It Some Time
Here’s the deal: while the temptation to devour your homemade jam immediately is real, it’s best to exercise a bit of patience. The flavors need time to meld and reach their peak deliciousness. So, resist the urge to crack open those jars and give your jam a little waiting room.
Patience is a Virtue – Trust the Setting Process
The setting process is where the magic happens. You see, when you make jam, it’s not just about creating a sugary spread with a burst of fruity goodness. It’s about achieving the perfect balance of flavors, textures, and consistency. Allowing your jam to set properly will elevate it from merely good to absolutely exquisite.
Let It Cool and Settle – Good Things Come to Those Who Wait
Picture this: you’ve just taken your jars of jam out of the hot water bath, and they’re glistening with potential. It’s time to let them cool and settle. Place the jars on a clean towel, resisting the urge to touch, tap, or disturb them in any way. Leave them undisturbed for 24 hours, allowing the jam to set and reach its desired thickness. Trust us, this little act of restraint will be worth it.
Checking for That Perfect Set – The “Gel Test”
Now comes the fun part: checking if your jam has achieved the perfect set. To do this, remove a spoonful of cooled jam and place it on a cold plate. Let it sit for a few moments to cool. Gently nudge the jam with your finger. If it wrinkles and holds its shape, congratulations! Your jam is ready for consumption. If it’s still a bit runny, fear not! Give it some more time to set before retesting.
The Ultimate Reward – Time to Savor the Fruits of Your Labor
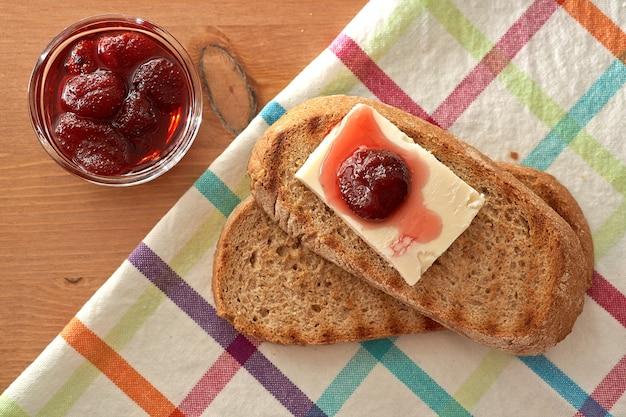
After patiently waiting, you’ve finally reached the moment of truth. It’s time to spread that homemade jam on your favorite bread, toast, or pastry. Take a bite, and let the burst of flavors dance upon your taste buds. Savor each mouthful, knowing that your patience and craftsmanship have rewarded you with this heavenly delight.
While it may be tempting to munch on your fresh batch of homemade jam straight away, it’s best to give it some time. Allowing the jam to set, cool, and develop its flavors will result in a truly remarkable culinary experience. So exercise a bit of self-control, embrace the waiting game, and relish the incredible taste of homemade jam that’s been perfected through patience. Your taste buds will thank you, and your guests will marvel at your jam-making prowess. Happy indulging!
Keywords: homemade jam, eat homemade jam, indulge in homemade jam, waiting game, setting process, let it cool, gel test, perfect set, savor the fruits, patience, culinary experience, homemade jam-making prowess
FAQ: Can You Eat Homemade Jam Right Away
Welcome to our FAQ section all about homemade jam! We know you’re eager to dig into that delicious jar of fruity goodness, but before you do, we’ve got some answers to the burning questions you may have. Sit back, relax, and let us quench your curiosity!
Do You Put Homemade Jam Straight in the Fridge
Absolutely! Once your homemade jam has cooled, you can pop it right into the fridge. Just make sure to transfer it to a clean, airtight jar or container to help preserve its delightful flavors.
Do You Have to Process Jam Immediately
Not necessarily. If you plan on consuming your homemade jam within a week or two and storing it in the fridge, there’s no need for immediate processing. However, if you’d like to extend its shelf life and ensure its safety, we recommend following proper canning and processing techniques.
Why Must Jars Filled with Hot Foods Be Sealed and Processed Right Away
Hot foods, like your steaming homemade jam, create steamy conditions inside the jars. Sealing and processing them right away helps create a vacuum seal, preventing harmful bacteria from spoiling your precious creation. Safety first, jam lovers!
Do You Put Lids on Jam When Hot or Cold
It’s best to place the lids on your jam jars when they are still hot. The heat helps create a tight seal as the contents cool down. Make sure to tighten them just right, though, not too loose and not too tight, to ensure a proper seal!
Can I Put Hot Jam into Hot Jars
Yes, absolutely! Placing hot jam into hot jars is a key step in the canning process. This method helps prevent jars from cracking due to drastic temperature changes. Hot jam, meet your sizzling counterparts!
Do You Flip Jars Upside Down After Canning
Flipping jars upside down after canning used to be a popular practice. However, with modern canning techniques, it’s unnecessary. Once your jam has been properly processed and sealed, you can allow it to cool in an upright position. No gymnastics required!
Do You Cool Jam Before Putting It in Jars
Indeed! It’s important to let your jam cool slightly before filling the jars. This helps prevent heat-related mishaps and ensures the proper consistency of your spreadable delight. A little patience goes a long way in the jam-making world!
Why Do You Turn Jam Jars Upside Down
Ah, the rumors of upside-down jam jars! While it may seem odd, turning jam jars upside down after they’ve cooled is an unnecessary step. Properly sealed jars will maintain their seal in an upright position. So save your elbow grease for spreading that jam on toast!
Can I Put Hot Jam Jars in the Fridge
You sure can! Once your homemade jam has been properly processed and sealed, you can safely transfer it to the fridge for storage. Just be careful not to place it next to any perishable items that may be sensitive to heat.
Does Homemade Jam Need to Be Processed
If you plan on enjoying your homemade jam within a week or two and storing it in the fridge, processing is not necessary. However, for longer shelf life and to ensure the safety of your scrumptious creation, we recommend proper processing techniques.
Can I Use Old Jam Jars for Homemade Jam
Yes, recycling jam jars is not only environmentally friendly but also practical. Just make sure to check the jars for cracks and give them a good cleaning before filling them with your delectable homemade jam. Upcycling at its finest!
Do You Let Homemade Jam Cool Before Putting It in the Fridge
Absolutely! Allowing your homemade jam to cool before placing it in the fridge helps it set properly. So resist the urge to dive right in, grab a cup of tea, and give your jam a chance to chill and reach its peak deliciousness.
How Long Do You Process Jam
The processing time for jam can vary depending on the recipe and the size of the jars. As a general rule of thumb, you’ll typically process your jam for about 10-15 minutes in a boiling water bath. Follow your recipe’s instructions and adjust accordingly for altitude.
How Do You Tell If Your Jam Is Sealed
The “pop” is what you’re looking for! Once your jam jars have cooled, press down on the center of each lid. If it doesn’t give and makes a satisfying popping sound, congratulations! Your jar is sealed. If it does give or makes a clicking noise, it’s time to either reprocess or refrigerate your jam.
How Long After Making Jam Can I Eat It
Patience is a virtue, my friend! It’s best to wait at least 24 hours after making your jam before indulging in it. This allows the flavors to meld and the jam to set properly. Trust us, the wait is worth it!
Do You Need to Put Jam in the Fridge to Set
No need to refrigerate your jam to help it set. Jam sets naturally as it cools at room temperature. So find a cozy spot away from direct sunlight, let it do its magic, and behold your perfectly set jam!
Should Lids Pop After Canning
Indeed! The satisfying pop of the lids is music to a canner’s ears. It indicates a successful seal and means your jam is ready for long-term storage. So embrace the symphony of seals and enjoy the fruits of your canning labor!
How Long Should Jam Boil For
Jam likes a good simmer and boil! The precise boiling time can vary depending on your recipe, but as a general guideline, you’ll want to boil your jam for around 10-20 minutes. Keep stirring, keep an eye on it, and find that sweet spot of tantalizing thickness!
How Do I Know If My Jam Is Set
Ah, the eternal question! To test if your jam has reached the desired consistency, place a small dollop on a chilled plate and give it a gentle push with your finger. If it wrinkles and remains in place, congratulations, your jam is set! If it’s still runny, keep simmering and testing until perfection is achieved.
Is It Necessary to Water Bath Jam
When it comes to canning jam, a water bath is your best pal. This process helps kill off any lingering bacteria and ensures a longer shelf life for your precious jars of fruity goodness. So embrace the bath and let your jam soak up all the safety it needs!
How Long to Let Jars Sit After Canning
After the canning process, it’s best to allow your jam jars to sit undisturbed for at least 12-24 hours. This resting period allows the jars to cool and the seals to fully set and stabilize. So keep your hands off those jars, be patient, and let time work its preserving magic!
Do You Need to Seal Jam Jars
Absolutely! Properly sealing your jam jars is crucial for their long-term preservation. The sealing process creates a vacuum seal that helps keep your jam fresh, safe, and oh-so-delicious. So grab your lids, tighten them up, and seal the deal on your homemade delicacies!
Do You Stir Jam When Boiling
Stir it, baby! When your jam is boiling away, make sure to stir it gently and regularly. This helps prevent it from sticking to the bottom of the pot and ensures even heating throughout. Keep that spoon swirling and embrace the dance of deliciousness!
Will My Jam Thicken as It Cools
Indeed it will! As your jam cools, it will gradually thicken and reach its desired consistency. So resist the urge to panic if it seems a bit runny straight off the stove. Give it some time, let it cool, and watch the magic of thickening unfold before your eyes.
And there you have it, folks! All your burning questions about homemade jam answered with a side serving of humor. Now, go forth and enjoy your homemade jam with the confidence of a jam connoisseur. Happy spreading!